Beyond woodworking basics
A few pointers on improving your woodworking and project design skills


At a previous Canadian Home Workshop Show, I spoke with a reader in front of the magazine’s Project Showcase, which featured projects on display. Each item was gorgeous, and that's why this man was unhappy. “I have a shop filled with great tools that I've been using for seven years, but my projects don't look like these. I can't put my finger on it, but something's missing. What can I do?”
This kind of dissatisfaction is a good thing. It's shows you're ready to move beyond the basics. Trouble is, you're not going to find the help you need to do that in the same place you learned basic woodworking. That's because the challenges of a dissatisfied intermediate woodworker are different than those of a novice. Assuming you have basic woodworking skills, the challenge then becomes a matter of combining tasteful design and good technical judgment with flair. And to make this happen consistently you need skills that go beyond just producing accurate cuts and a smooth finish.
There are three things you need to deal with as you begin any project for which you have high hopes: pleasing proportions, enduring function and classic joinery. Whether you get your project inspiration from plans or out of the blue, you'll hit closer to the mark if you have an understanding of the virtues that separate good woodworking projects from great ones. The tips you'll learn here will make sense in other projects, too.
One common factor behind many limp home workshop projects is that although they may be serviceable, they don't look much different from the conservative output of furniture factories. Your projects need to go beyond what appeals to the widest possible commercial audience, and to do that you need to start by doodling and exploring the limits.
When digital animators sit down at a computer to build action sequences for movies like Star Wars and Lord of the Rings, they usually begin in a mode called wire framing. That's a fancy name for simple, computer-generated line–art versions of how strange creatures will look. No one's interested in skin tone or lifelike sounds at this stage because they're irrelevant. Your own version of wire framing is also the best way to start hewing out proportions of eye–catching projects in broad strokes. You don't have to work to strict scale at this stage or decide on a finish. You don't even need to use paper. What really matters is that you start identifying sizes and shapes. You can start with a pencil, but you might find large cardboard shipping cartons a worthwhile medium, too. Is 72" too short for a table top in your dining room? Exactly what does a 32"-tall desk look like next to your chairs? Cut out some cardboard and put it in the room for a quick answer.
Are you doodle-challenged and not crazy about cardboard? If you have a computer, consider the current digital champion, a program called Sketch-Up. It's an award-winning drawing application that turns 2-D bumblers into 3-D masters. I can vouch for this from experience, especially the way it allows any drawing to be viewed from all angles. Many of CHW's builders also use Adobe Illustrator.
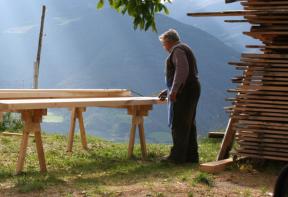
Let's see how these key design principles apply to the design of a trestle table. Trestles are the end assemblies that support the tabletop, and there are three features about the ones shown here that can improve your work. First, they're large enough to be made of three pieces joined with beefy, 1/2"-dia. fluted dowels. Besides being clean, dowel joints go beyond what's possible with biscuits on two counts. Big dowels are stronger than the largest biscuits typically available, and they're easier to install precisely in more than a few situations. Also, as you work, make neighbouring pieces of wood different thicknesses to create some visual interest where one part meets its neighbour. Besides looking good, you'll hide slight areas of joint misalignment this way.
Enthusiasm for wood is why we work with the stuff, but being a keener has its downside if you happen to have a router in hand when you have an enthusiasm-attack. With all the great bits around, it's pretty hard to resist profiling everything in sight. But if you're interested in creating projects with classic good looks, then keep roundovers, ogees and other fancy edge treatments to a minimum. If a part doesn't look good without an ogee, it's not going to get much better with one.
The only exception to this minimalist approach is the edges of high-traffic tabletops or desks, and only for practical reasons. If you're planning to stain your project dark, consider something else. Crisp edges start to look pretty ragged as stain wears through quickly on corners due to concentrated wear from elbows and forearms. A rounded edge, or even a small chamfer, wears longer before getting down to bright, unstained wood because the abrasive action is spread over a large area.
The reason mass-produced furniture is cheap and plentiful is because popular designs are easily duplicated. But there are some age-old areas of the craft that are just too ornery and obscure to ever be wrestled into an efficient factory setup. Tusk tenons are one. Beyond their use on trestle tables, they also do a fantastic job on bed rails, simple benches and desks. Strikingly effective, they go way beyond ho-hum.
Tusk tenons are traditional joinery features that extend right through mating parts, held together with wedges. They're super-strong and can be made to knock down for furniture transport. My favourite way to cut tusk tenon holes is with a plunge router, a plywood pattern and a flush-trimming bit with a bearing on the shaft.
In the 15 minutes I spent with the guy who left the show feeling worse than when he arrived, another thing came up. Perhaps more important than any of the tips you've read about here is something the Japanese call kaizen. It means continual improvement. Every time you feel badly about your work, analyze it, identify a solution and put it into practise next time. Do this diligently and your work will eventually find its way to the other side of those fuzzy, velour-covered ropes.
Instructions
- 3M rubbing pad under a random orbit sander buffs final tabletop to flawless finish
- 1/2-dia. fluted dowels form strong joints between trestle parts
- crisp corners offer classic good looks
- include non-commercial details, like incised carving
- tusk tenons are strong, attractive and come apart for transport
- pattern routing eliminates the need for edge sanding
- underside of table should be clean and well finished
- router bit bearing follows plywood template to create curved edges
- plywood gussets strengthen framework and hold tabletop screws
To leave a comment, please log in


No comments